

Imagine putting together your quilt sandwich—the top, batting, and backing—without a single safety pin in sight. No messy overspray, no crawling around on the floor for hours. That's the beauty of fusible batting for quilting. It's a clever, heat-activated material that gently fuses your quilt layers together, completely skipping the tedious and often frustrating basting step.
Think of it as your shortcut to a perfectly smooth, pucker-free quilt.
What Is Fusible Batting And How Does It Work?
At its core, fusible batting is simply a high-quality quilt batting with a very fine, heat-activated adhesive on one or both sides. Don't worry, it's not like a thick, sticky glue. This adhesive is totally dry and inert until you introduce the heat and steam from your iron.
The process couldn't be simpler. You lay out your backing fabric, place the fusible batting on top, and then position your quilt top. A pass with a hot iron melts the microscopic dots of adhesive, creating a gentle bond that holds everything together. This instantly stabilizes the entire quilt sandwich, stopping the shifting and stretching that can turn a beautiful quilt top into a puckered mess.
The Magic is in the Basting
The real genius here is how fusible batting streamlines the most dreaded part of making a quilt: the basting. Pinning can take ages, leave little holes, and you’re constantly having to work around them as you quilt. Spray basting is faster, but it can be messy, requires good ventilation, and sometimes leaves a sticky residue.
Fusible batting transforms this chore into a quick session with your iron.
The bond it creates is just strong enough to get you through the quilting process. It's specifically designed not to gum up your sewing machine needle. Once you’ve finished quilting and give the project its first wash, the adhesive softens right up, leaving you with a wonderfully soft quilt that drapes beautifully. You can learn more about the fundamentals in our guide explaining what is quilt batting and its role in your projects.
A Quilter's Secret Weapon
This level of convenience has made fusible batting a game-changer for so many quilters. It’s a standout innovation in the quilt batting market, which was valued at a whopping USD 1.8 billion. As quilting continues to boom, products that save time and frustration are in high demand. In fact, using fusible batting can help you finish your quilt 30-50% faster than with traditional methods.
Ultimately, fusible batting gives you control right from the start. It ensures your quilt top stays perfectly aligned with the backing, so your piecing and quilting stitches can truly shine without any weird fabric distortions hiding underneath. It’s one of the best tools for getting professional-looking results with a whole lot less effort.
Choosing The Right Fusible Batting For Your Project
Picking the perfect fusible batting for quilting can feel overwhelming, but it's really not so bad. Think of it like choosing the right kind of flour for a recipe—some are better for bread, others for a delicate cake. Your choice of batting will define the final look, feel, and drape of your quilt, so getting familiar with your options is the first step to bringing your vision to life.
Ultimately, the decision comes down to a few key things: what fiber it’s made of, its loft (or fluffiness), and whether the fusible magic is on one side or two. Each of these elements plays a huge part in whether you end up with a sleek, modern wall hanging or a big, cozy bed quilt you can't wait to curl up under.
Matching Fiber to Function
The most important choice you'll make is the material itself. You’ll mainly find three options on the shelf: cotton, polyester, and a blend of both. They each bring something different to the table.
- 100% Cotton: This is your classic, all-natural choice. It’s breathable and just gets softer and more crinkly with every wash, giving your quilt that beloved, time-worn look. It provides a flatter finish with gorgeous stitch definition.
- Polyester: If you need a workhorse, this is it. Polyester is known for its durability and higher loft, so it’s lightweight but still incredibly warm. It also resists mold and mildew, holds its shape beautifully, and barely shrinks, making it a fantastic pick for quilts that will see a lot of love and use.
- Cotton/Polyester Blends: Usually an 80/20 mix, blends give you the best of both worlds. You get the soft, natural feel of cotton but with the strength, stability, and low shrinkage that polyester provides. It's no wonder this is the go-to for so many quilters.
This little decision tree can help you figure out when basting is needed and why fusible batting is such a game-changer.
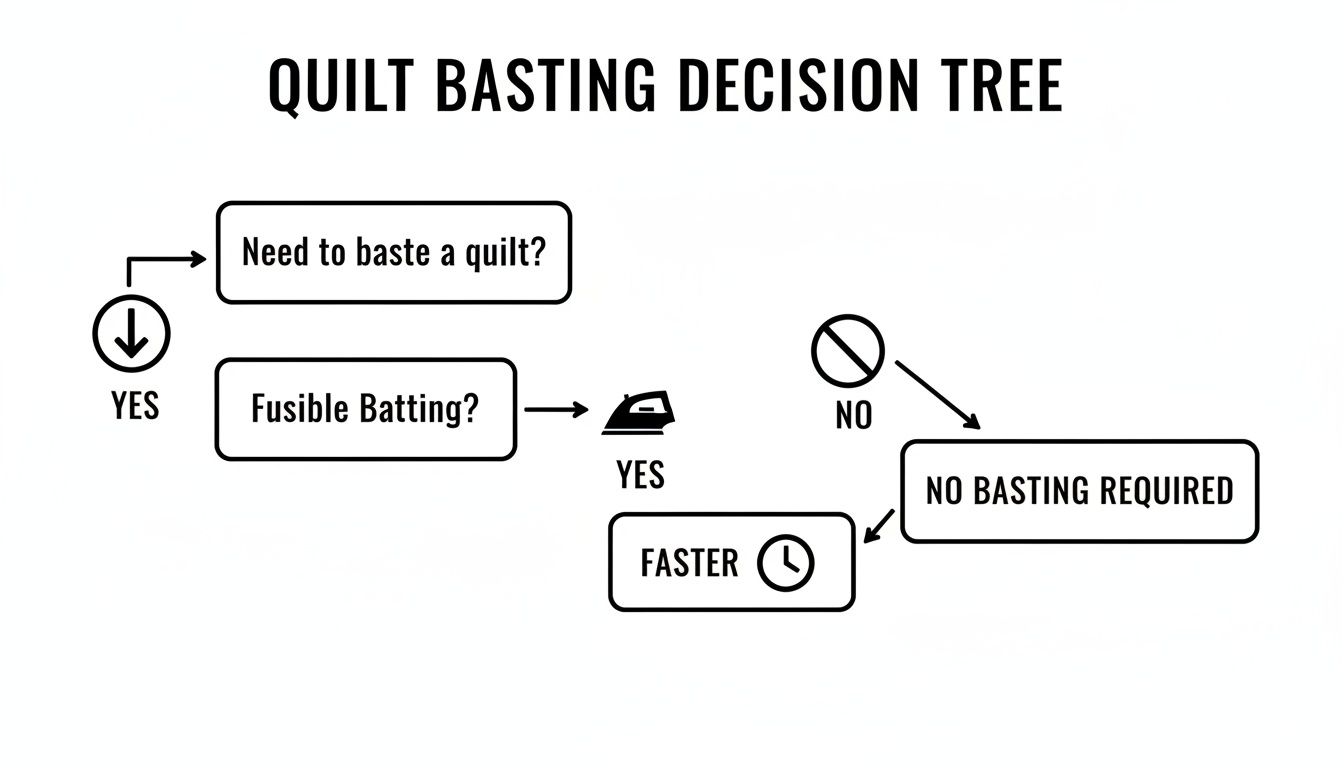
As you can see, when your project calls for basting, fusible batting is simply the fastest way to get your quilt sandwich secure and ready for the fun part—the quilting!
Understanding Loft and Fusible Sides
When you hear quilters talk about loft, they’re just talking about the batting’s thickness and puffiness. Low-loft batting is thin and creates a flatter quilt, which is perfect for showing off intricate machine quilting or achieving a crisp, modern look. High-loft batting is much thicker, giving you that comforter-like feel that’s ideal for tied quilts or extra-snuggly projects.
You'll also need to decide between one-sided and two-sided fusible options.
- One-Sided Fusible: The adhesive is just on one side. This is handy for appliqué projects or when you want to fuse the batting to your quilt top first, before adding the backing later.
- Two-Sided Fusible: This is the most common and, frankly, the biggest time-saver. With adhesive on both sides, you can assemble your entire quilt sandwich—backing, batting, and top—and fuse it all together in one go with your iron.
Key Takeaway: If you're just starting out or want a reliable, all-purpose option, you can't go wrong with a low-loft, two-sided fusible 80/20 cotton/poly blend. It’s forgiving, works for almost anything, and gives you consistently beautiful results. Want to dive deeper? We cover even more in our guide to the different types of quilt batting.
Interestingly, polyester is really having a moment in the fusible world. The polyester batting market is growing at a projected 9.2% CAGR—the fastest of any fiber type—because it's both affordable and incredibly resilient. Fusible polyester boasts shrinkage rates under 2%, and 65% of professional quilters prefer it for machine work because it cuts down on fiber migration (that annoying "bearding") by up to 70%. The trends show that quilters are embracing materials that deliver professional, long-lasting results with less fuss.
Nailing the Technique: How to Use Fusible Batting for Perfect Results
This is where the magic really happens. Using fusible batting can turn the often-dreaded task of basting into a simple, almost foolproof step. Say goodbye to the endless pinning, the messy sprays, and the puckers that plague traditional methods. With a little heat, your iron is about to become your best quilting friend.
The secret to a great finish is all in the prep work. Before you even think about plugging in that iron, make sure your quilt top and backing fabric are pressed beautifully flat. Any little crease you ignore now will be permanently locked into your quilt later.
Think of it less like basting and more like carefully building your quilt sandwich, layer by perfect layer.
Setting Up Your Workspace
First things first, find yourself a large, flat surface that can handle the heat. Your ironing board is great for smaller projects, but for a big quilt, you might need to take over a clean floor. Just be sure to protect it with a heat-proof mat or even a thick, folded towel.
A clean space is non-negotiable. Any stray threads, lint, or pet hair will get fused right into your project.
Once you're set, lay your backing fabric down, wrong side facing up. Use painter's tape to gently secure the corners and edges, pulling the fabric taut—but not stretching it. You’re aiming for a smooth, drum-tight canvas to build on.
The Foolproof Fusing Process
With your foundation ready, it's time to assemble and fuse your quilt. This step-by-step method is designed to give you a flawless bond, free of shifting or bunching. The key is to always work from the center out, pushing any potential wrinkles or air bubbles toward the edges.
- Position the Batting: Carefully unroll your fusible batting over the secured backing. Gently smooth it flat with your hands, starting from the middle and working your way out to the corners.
- Add the Quilt Top: Now, place your pressed quilt top right side up over the batting. Take a moment to get it perfectly centered and straight. Smooth it out just like you did with the batting.
- Set Your Iron: Preheat your iron to the temperature recommended by the batting manufacturer. This is usually a medium-hot setting, often with steam. Don't guess here! Too low and the adhesive won't activate; too high and you could scorch your fabric.
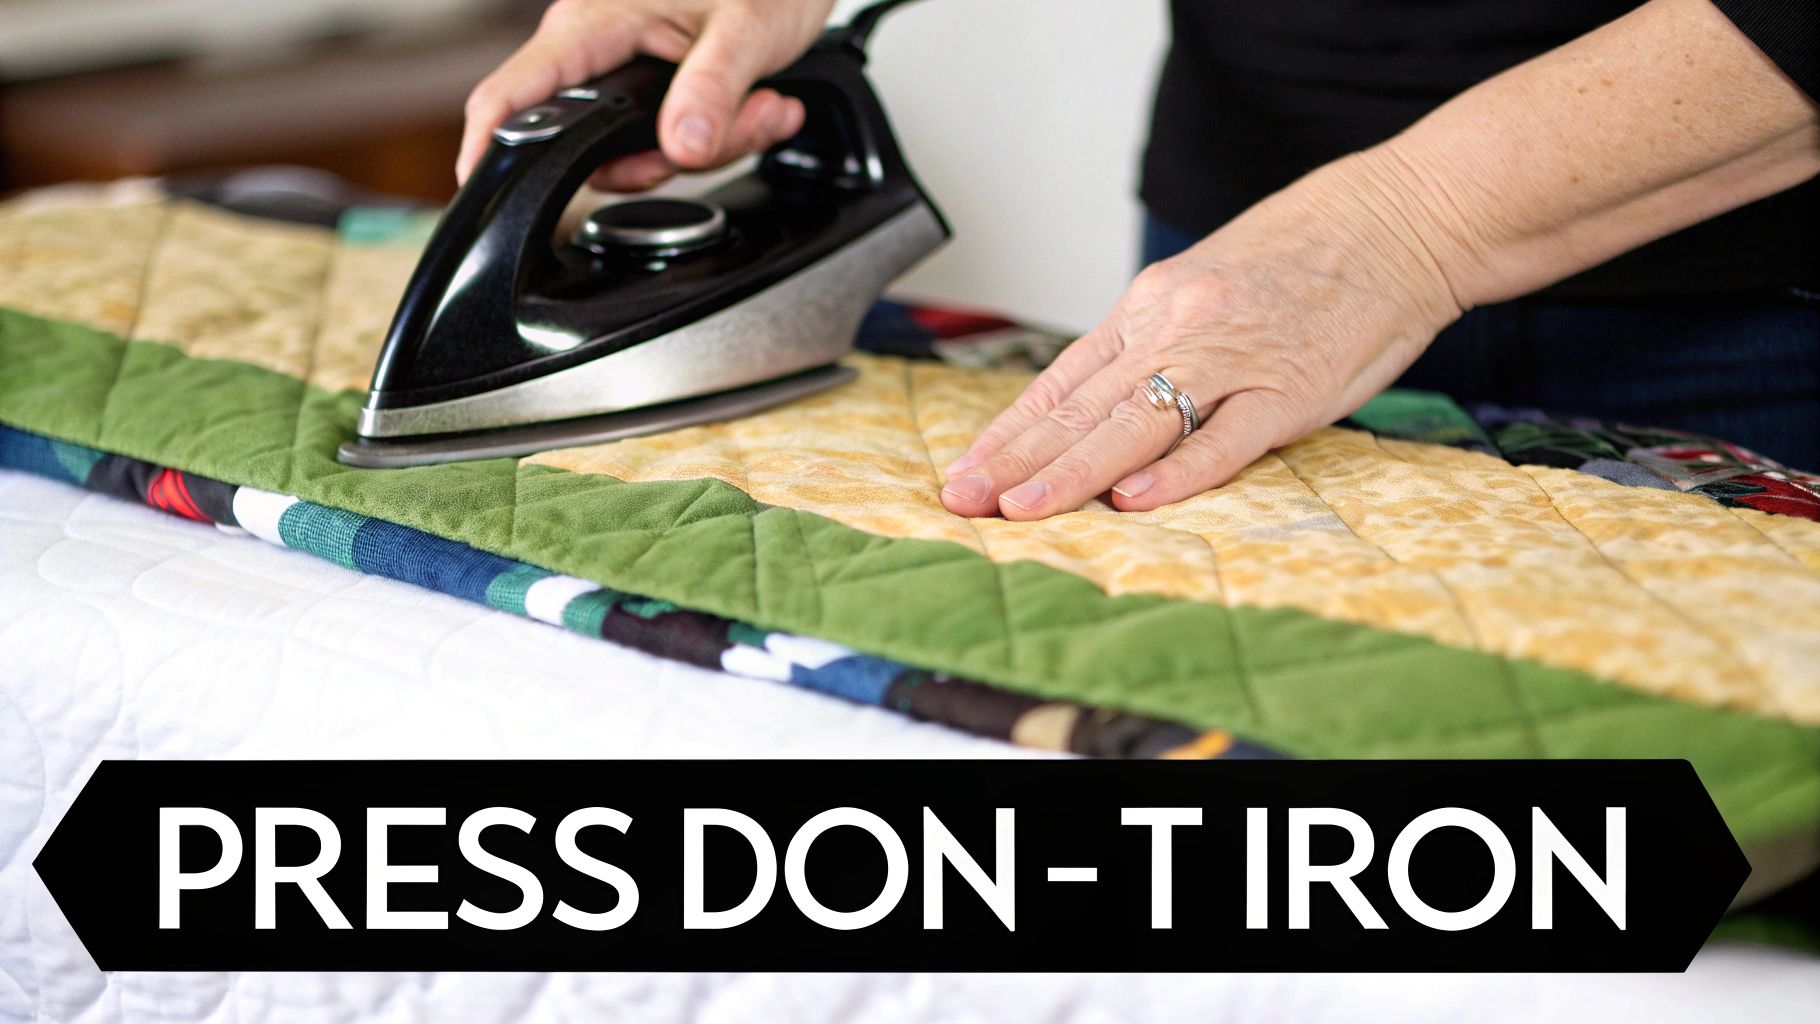
- Press, Don’t Iron: This is the most important part: press, do not glide. Sliding the iron around will push the layers and create wrinkles. Instead, place the iron down, hold it for a few seconds (check the instructions!), then lift it straight up and move to an adjacent, slightly overlapping spot.
- Work Systematically: Begin pressing in the center of your quilt and move outward in a steady, grid-like pattern. This method pushes any trapped air out and keeps everything perfectly aligned. For a larger quilt, you might need to fuse one section at a time, carefully un-taping and repositioning as you go.
Fusible batting is an incredible shortcut, but it doesn't replace the fundamentals of good quilt construction. If you want to explore all the options, our guide on how to baste a quilt offers some great insights that work well alongside the fusible method.
Pro Tips for a Perfect Finish
Even a simple process has a few insider tricks that can take your results from good to great. Keep these tips in mind to avoid common mistakes and make your fusible batting for quilting experience a total success.
- Use a Pressing Cloth: A thin piece of cotton fabric between your iron and the quilt top acts as a great buffer, preventing any scorching and protecting more delicate fabrics.
- Let It Cool: The adhesive sets as it cools. After you press a section, give it a moment to cool down completely before you move it. Moving it while it's still warm can cause the layers to shift.
- Check Your Bond: Once a section is cool, gently lift a corner to make sure it's stuck fast. If it separates easily, it just needs a little more heat and time.
Follow these steps, and you’ll end up with a stable, smooth quilt sandwich that is an absolute dream to quilt on. The secure layers mean you can finally focus on your beautiful stitching without constantly fighting shifting fabric.
When Fusible Batting Is Your Secret Weapon
Knowing how fusible batting works is one thing, but knowing when to pull it out of your stash is what really elevates your quilting game. This isn't just another choice in your supply drawer; it's a game-changing tool for those projects where your usual basting methods just don't cut it. Think of it this way: you wouldn't use a sledgehammer to hang a picture frame, right? In the same way, you don't need to fight with pins on a tiny, intricate project when there's a much smarter way.
Some quilts are practically made for the ease and stability of fusible batting. For those special projects, it moves beyond being a simple convenience and becomes the key to turning a frustrating chore into a genuinely fun part of the process.
Ideal Projects for Fusible Batting
The magic of fusible batting for quilting truly shines when you're tackling projects that are either too small or too tricky for pins and spray baste. Trying to maneuver a dozen pins around a miniature wall hanging or a densely pieced table runner is a surefire way to get pricked fingers and puckered fabric. Fusible batting just makes that whole headache disappear.
Here are the top situations where fusible batting is the hands-down winner:
- Small Quilts and Wall Hangings: Getting a tiny quilt sandwich perfectly flat and secure can be surprisingly tough. A quick press with fusible batting, and you've got a stable canvas ready to go in minutes.
- Table Runners and Placemats: These long, skinny projects are notorious for shifting and warping while you quilt them. Fusing the layers first locks everything in place.
- Tote Bags and Purses: When you're making bags, you need crisp, stable layers. Fusible batting provides that structure without adding a ton of bulk, helping to prevent that dreaded sag.
- Art Quilts and Appliqué: For any project with lots of little appliqué pieces or delicate piecing, the fused layers create a firm foundation that keeps everything from stretching or distorting under the needle.
The quilting world, now a solid $4.5 billion market, absolutely boomed after 2020 as more people discovered the joy of crafting at home. This surge led to a 35% spike in fusible batting sales. Why? Its simple, no-pin convenience helps quilters cut down their prep time by as much as 40%. Crafters are clearly choosing efficiency, and you can dig into more of these trends in the Craft Industry Alliance's latest survey results.
When Traditional Batting Might Be Better
As much as I love it, fusible batting isn't the perfect solution for every single quilt. That firm hold is a huge plus for machine quilting, but it can be a bit of a drawback in other situations. Sometimes, the good old-fashioned way is still the best.
You'll probably want to stick with a non-fusible batting for:
- Hand Quilting: You can hand quilt through some of the lighter fusible products, but many hand quilters feel that the adhesive adds a bit of resistance. This can make it tougher to pull your needle through and get those beautifully smooth, even stitches you're after.
- Large Bed Quilts: Let's be practical. Fusing a king-sized quilt is a huge undertaking. You need a massive, heat-safe surface and a lot of patience to press every single inch evenly without creating wrinkles.
- Quilts Requiring Maximum Drape: If your goal is an incredibly soft, cuddly quilt that drapes like a dream, a traditional cotton or bamboo batting without any adhesive will likely give you a more supple feel right off the bat.
Picking the right batting is one of the most important decisions you'll make for your project. To help you sort through all the options, our quilt batting comparison chart breaks down the different fiber types and what they do best. A little knowledge here goes a long way in making sure you have the perfect foundation for whatever quilt you're dreaming up next.
Troubleshooting Common Fusible Batting Problems
Even with the best prep work, you’re bound to hit a snag with fusible batting for quilting every now and then. But don't worry—most of these common issues are more like minor detours than dead ends. With a few simple tweaks, you can get your project back on track and achieve that flawless, smooth finish you're after.
Think of it as part of the learning curve. Every little fix builds your confidence and makes you a more skilled quilter. The truth is, most problems with fusible batting boil down to three simple things: heat, time, and pressure. Getting that trio just right is the secret sauce.
Issue 1: The Batting Just Won't Stick
This is, without a doubt, the most common headache quilters run into, but it almost always has a simple fix. If you find your quilt layers are peeling apart easily after you've pressed them, it just means the adhesive hasn't fully woken up yet.
Here’s how to get it to cooperate:
- Check Your Iron's Temperature: Is your iron hot enough? Double-check the temperature recommended by the batting manufacturer. An iron that's too cool simply won't melt the fusible agent.
- Give It More Time: You might just be moving the iron too quickly. Remember, this is a pressing motion, not an ironing glide. Try counting to at least 10-15 seconds in each spot before lifting the iron and moving to the next.
- Add a Little Steam: Many fusible adhesives need a good burst of steam to activate properly. See what your product's instructions say, and make sure your iron is filled with water.
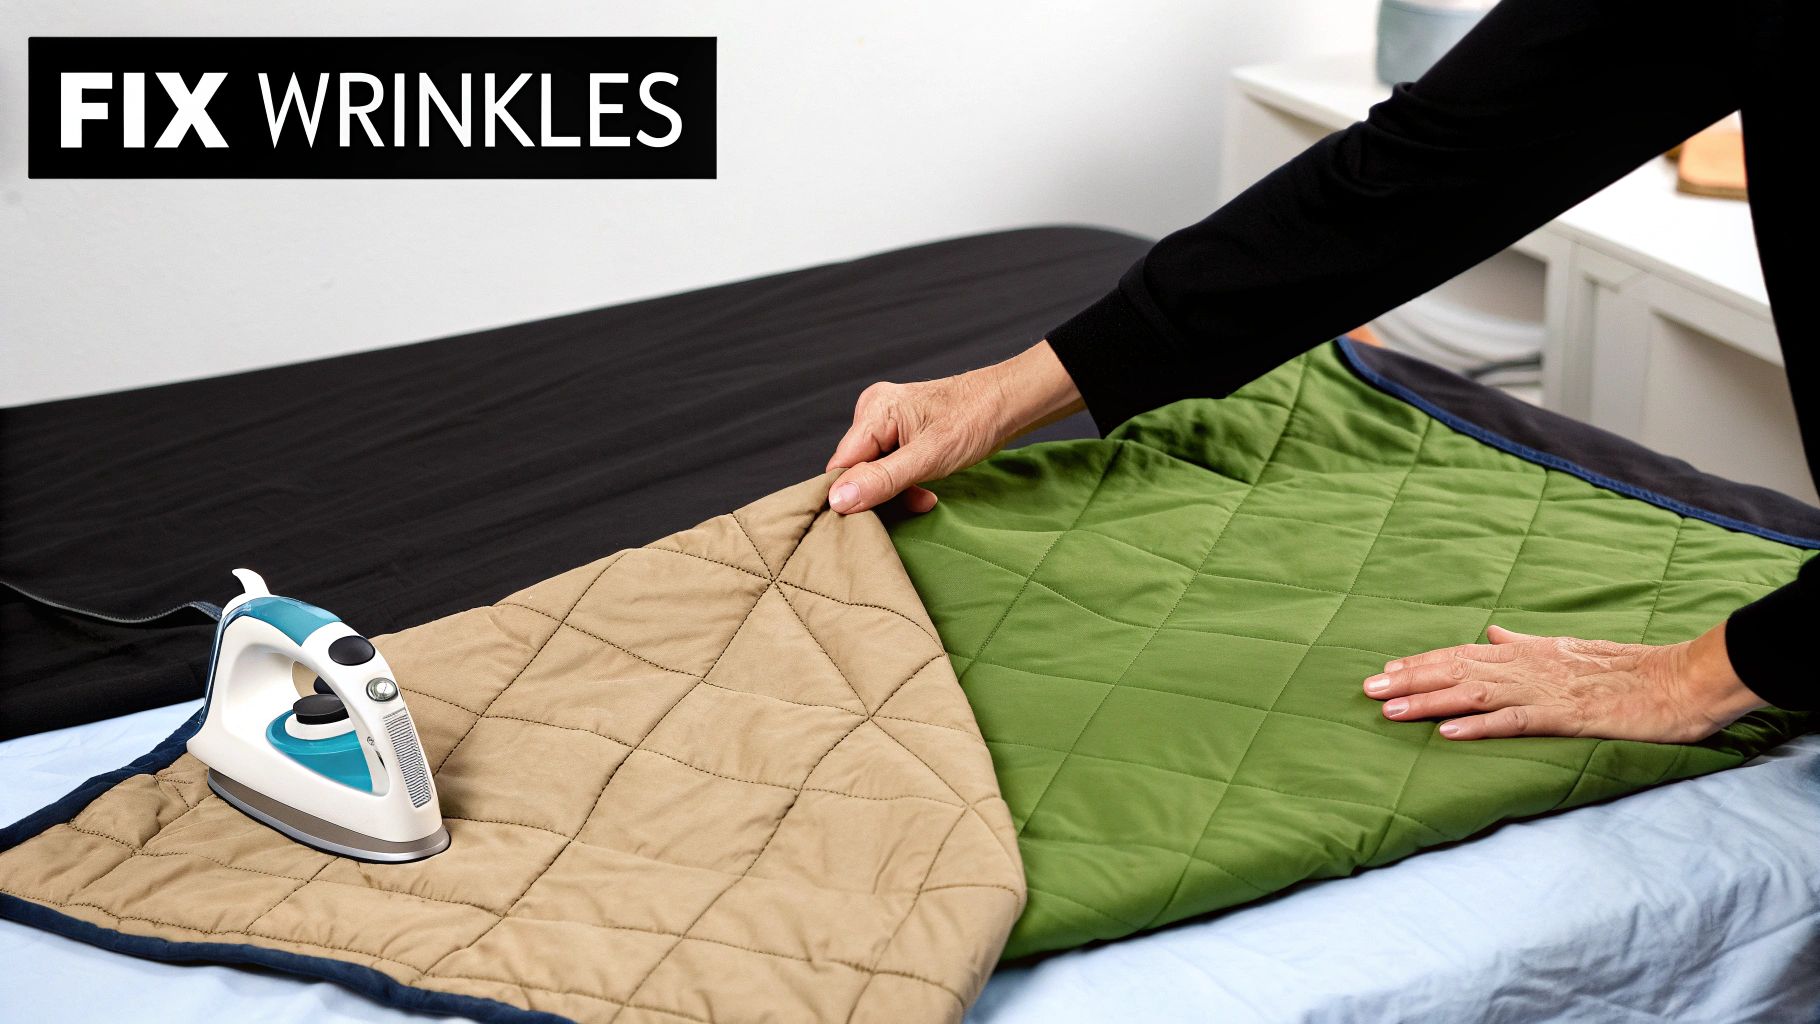
Issue 2: My Quilt Has Wrinkles or Bubbles
Finding a pucker or wrinkle fused right into your quilt sandwich is frustrating, I know. But it's often fixable! This usually happens when the fabric decides to shift around while you're pressing.
To fix it, just gently reheat the wrinkled area. Place your hot iron back over the spot for a few seconds to soften the adhesive. Once it’s warm, you should be able to carefully lift the fabric, smooth out the wrinkle with your hands, and then press it back down firmly. Just be sure to let it cool completely before you move it.
Pro Tip: To stop wrinkles before they start, always work from the center of your quilt outward. This technique pushes any excess fabric or trapped air toward the edges, giving you a perfectly flat surface from the get-go.
Issue 3: The Finished Quilt Feels Stiff
There's a persistent myth that fusible batting always makes quilts stiff. While the early stuff might have been a bit rigid, modern products are designed to be wonderfully soft and flexible. If your quilt feels a little stiff, it’s usually because the adhesive got a bit too hot.
Unfortunately, this is one of those problems that's tough to undo. Prevention is really your best bet here. Always use a pressing cloth and stick to the manufacturer's recommended heat settings to protect both the adhesive and your fabric. The good news is that once your quilt is all quilted and has gone through its first wash, any initial stiffness should relax considerably, leaving you with a soft, cuddly finish.
Caring For Quilts Made With Fusible Batting
You’ve poured your heart, creativity, and countless hours into making a beautiful quilt. Now comes the part that makes some people nervous: caring for it so it lasts a lifetime. Thankfully, looking after a quilt made with fusible batting for quilting is surprisingly straightforward, and knowing the right way to do it will give you peace of mind.
The biggest worry I hear from quilters is that washing will make the quilt stiff or cause the fusible bond to fail. Let me put that fear to rest. Modern fusible battings are designed to handle real life. They actually get softer and more flexible with every wash, so you can use and love your quilts without hesitation.
Gentle Washing for Lasting Softness
The secret to keeping your quilt’s colors vibrant and its stitching intact is to treat it to a gentle wash. Think of it less like doing a load of dirty towels and more like giving your fabric masterpiece a refreshing spa day.
Always stick with cold water and a mild, color-safe detergent. Hot water is too aggressive for fabric dyes and, over the long haul, isn't great for the adhesive. A gentle or delicate cycle with a slow spin is all you need—it's enough to get the quilt clean without putting stress on the seams.
For a little extra protection, pop your quilt into a large mesh laundry bag or even a clean duvet cover before it goes in the machine. This is a simple trick that helps prevent snagging or twisting.
Drying Your Quilt The Right Way
Drying your quilt correctly is just as crucial as washing it properly. You want to get the moisture out without blasting it with high heat, which is the number one enemy of both your fabric and the batting inside.
- Tumble Dry on Low: Go for the lowest heat setting on your dryer. I like to toss in a few wool dryer balls to help fluff things up and keep the quilt from getting tangled.
- Pull It Out While It's Still Damp: This is a big one. Never dry your quilt until it’s bone-dry and crispy. Take it out when it still feels slightly damp to the touch.
- Let It Air Dry the Rest of the Way: The best way to finish is by laying the damp quilt flat on a bed or across a couple of drying racks. This final air-drying step lets the quilt relax back into its natural shape and prevents any potential shrinkage.
I can't tell you how many times I've heard the myth that fusible batting creates a stiff quilt. While that might have been true for some of the early products years ago, today's high-quality fusibles are a completely different story. Once quilted and washed, the adhesive softens right up, giving the quilt a beautiful drape that’s nearly impossible to tell apart from one made with non-fusible batting.
Long-Term Care and Storage Tips
Great quilt care doesn't stop at the laundry room. When you're not snuggling under your quilt, store it in a cool, dry place away from direct sunlight, which is a notorious fabric-fader.
Whatever you do, don't store it in a plastic bag! Plastic traps moisture and can lead to mildew. A breathable cotton or muslin bag is always the best choice.
And if you ever need to press your quilt, just use a warm iron—never hot—and a pressing cloth to protect the fabric. Follow these simple steps, and the love you stitched into every seam will stay bright and beautiful for generations to enjoy.
Got Questions About Fusible Batting? Let's Clear Things Up.
Even for seasoned quilters, trying something new can bring up a few questions. When it comes to fusible batting, I hear the same handful of concerns pop up all the time. Let’s tackle them head-on so you can get started with total confidence and skip any guesswork.
Think of this as your go-to guide for busting myths and getting the real story on this game-changing quilting tool.
Will Fusible Batting Make My Quilt Stiff?
This is easily the biggest worry I hear, but I can tell you from experience: modern fusible battings are a world away from the stiff stuff of the past. Today's products are designed to be incredibly soft and flexible once they're fused and washed.
The final quilt has a beautiful, natural drape that you’ll love. The secret is simply following the manufacturer's heat instructions. If you get the iron too hot, it can feel a little stiff at first, but that almost always disappears after the quilt is stitched and gets its first wash. Honestly, you'd be hard-pressed to tell the difference between it and a quilt made with traditional batting.
Can I Still Hand Quilt with It?
Absolutely, but you'll want to be a little selective. Some fusible adhesives can add a tiny bit of resistance, which might make it tougher for your needle to glide through.
For the best experience, look for a fusible batting that says it's good for both hand and machine quilting. These usually have a much lighter adhesive. In fact, many hand quilters I know swear by it because the fused layers provide incredible stability. No more shifting means your stitches come out more even and consistent.
A common misconception is that the adhesive is like a thick layer of glue. It’s not! Think of it as a super-fine, web-like resin that melts with heat to gently bond the fabric fibers together, creating a secure hold that’s still wonderfully flexible.
Is This Stuff Going to Gum Up My Sewing Machine Needle?
A good quality fusible batting for quilting won't cause you any trouble. The adhesive is activated by heat, so it isn't tacky or sticky at room temperature. It’s designed to bond to fabric, not your needle.
That said, if you're quilting for hours on end, you might notice a tiny bit of residue building up. It’s a super easy fix, though—just give your needle a quick wipe with an alcohol pad. I always recommend starting a big project with a fresh, sharp needle anyway, like a Microtex or a designated Quilting needle. That alone will ensure everything sails through smoothly.
Do I Need to Pre-Wash Fusible Batting?
Nope! In fact, most manufacturers will tell you not to. Pre-washing can weaken or completely wash away the fusible agent, which defeats the whole purpose. Your quilting cottons are what you really need to pre-wash, since they're the most likely to shrink.
Keep in mind that battings made from natural fibers like cotton might shrink just a little (usually 1-3%). This is what creates that classic, slightly crinkled vintage look after washing. If that's not the vibe you're going for, just grab a polyester or poly-blend fusible batting—they have virtually zero shrinkage.
Ready to ditch the pins and get to the fun part faster? Check out the premium selection of fusible and traditional batting at Quilt Batting. You’ll find the perfect foundation for your next masterpiece at https://quiltbatting.shop and simplify your entire process.